Custom Charts
What are Custom Charts?
Custom Charts enable you to develop your own specialized data visualizations and connect them to Luzmo, allowing you and your users to easily add them to Luzmo dashboards. If our built-in chart types don't fully cover your specific visualization needs, you can create custom charts tailored exactly to your requirements.
Why use Custom Charts?
- Complete visualization flexibility: Design exactly the chart types your data or use case needs, ensuring your end-users get precisely the visualization experience required.
- Efficient implementation: Write only your visualization code and let Luzmo do the rest — querying, filtering and interactivity is all handled for you. Maintain complete control over your visualization UI/UX while leveraging Luzmo's powerful analytics infrastructure.
- Full integration with Luzmo's capabilities: Your custom charts seamlessly integrate into Luzmo dashboards.
- Multi-query support: Custom Charts can now fire multiple queries in parallel across different aggregations, granularities, or even unlinked datasets, unlocking more advanced use cases that require combining data shapes a single query can’t express on its own.
- Configurable options: Define your own chart options — for example display settings, colors, number formatting, or sorting — that dashboard editors can adjust from the chart's settings panel. Build a chart once and let its settings handle the variations, without maintaining a separate chart for each.
Availability: The ability to create Custom Charts and use them in your dashboards is available on our Elite and Enterprise plans.
Getting started
Below you can find the steps required to create a Custom Chart and make it usable within Luzmo dashboards.
1. Download and run our custom chart builder environment
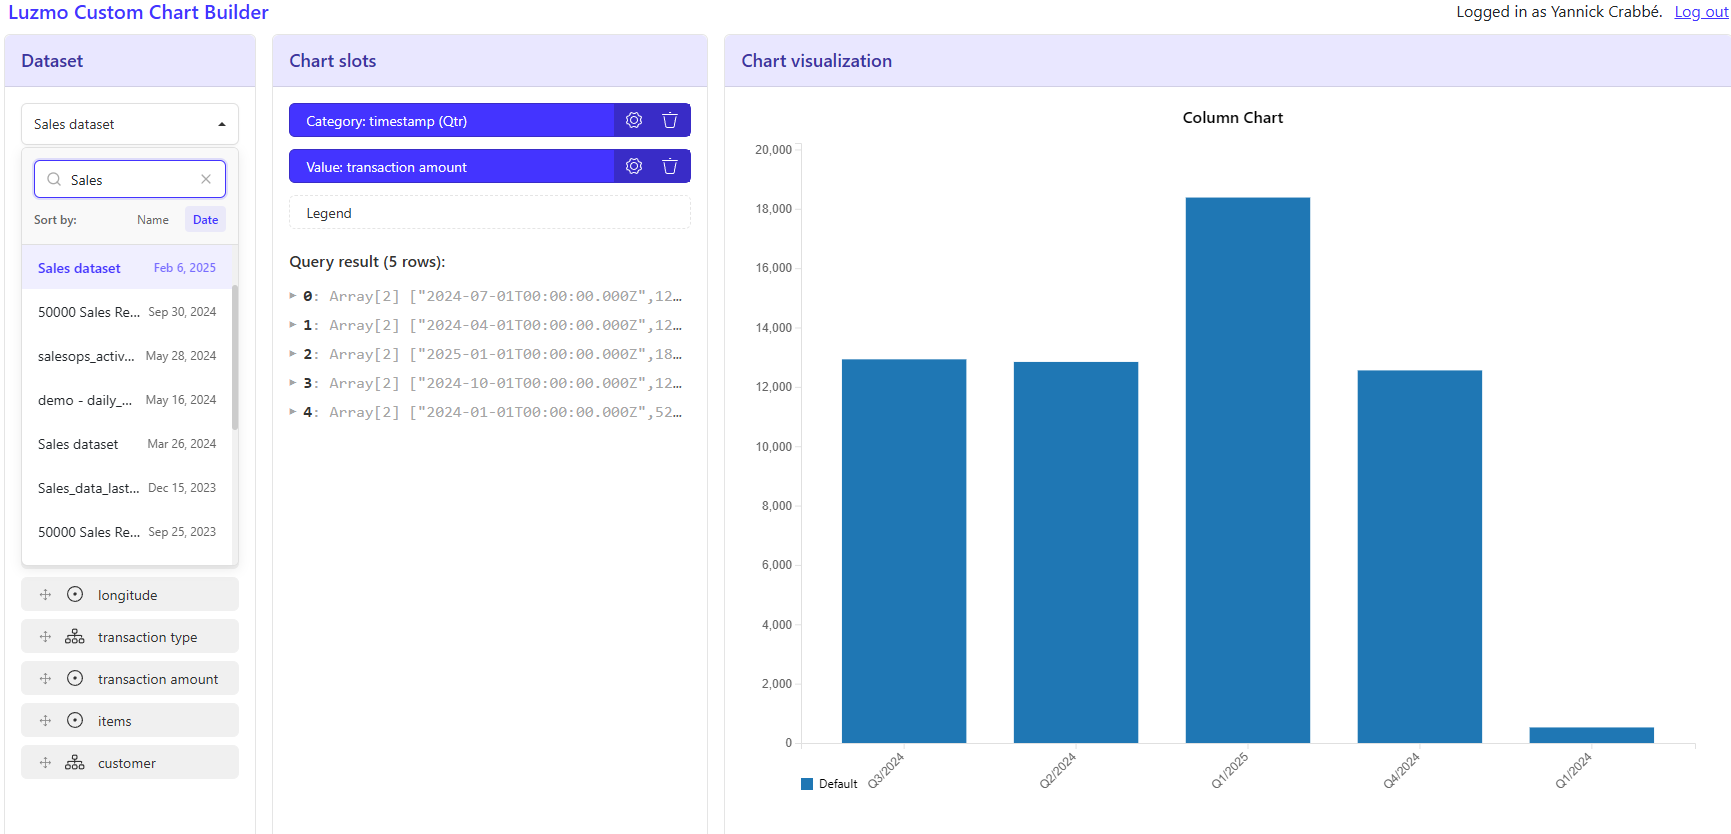
Once it's up and running, log in to the environment with your Luzmo account. This will bring you to the builder environment. The page features 4 areas:
- Dataset selection: open the dropdown to select one of your datasets to show its columns.
- Chart slots: this area shows a visual representation of the chart slots you defined in your
manifest.json. Changes to the manifest will be reflected in this area. Columns can be dragged to these chart slots. Once all required slots are filled, a Luzmo query will execute and show you the returned data. This gives you useful information about the shape of the data you'll be working with in your visualization code. - Chart options: this area renders the option controls you defined in your
manifest.json(such as toggles, dropdowns, sliders, or color pickers). Changing a control passes the updated values to yourrendermethod, so you can test how your chart responds to different settings as you develop. - Chart visualization: this area executes the
rendermethod of your chart code with the data returned by the query. It shows you how your custom chart will look in your dashboards, based on your current code.
The builder environment with a dataset selected and some chart slots filled looks like this:
2. Implement your custom chart in the builder
Once the builder environment is up and running, you can start developing your visualization according to Luzmo’s specifications.
A high level outline of the required steps:
- Define the chart slots of your chart in the
manifest.json. Chart slots are used to map your datasets and columns to data that can be used in your chart. You can check if your chart slot definition is valid by runningnpm run validate. As a next step, you can select a dataset from the dropdown and drag dataset columns to your chart slots. This will execute a Luzmo query and show you the resulting data. - Optionally, define configurable options in the
manifest.jsonto let dashboard editors tweak your chart. Luzmo renders these definitions as controls (such as a toggle, dropdown, slider, or color picker) in the chart's settings panel, so you don't build any settings UI yourself. Read the selected values from theoptionsargument of yourrenderandresizemethods to apply them. You can also addtranslationsfor your slot and option labels. - Write your visualization methods (
renderandresize) in thechart.tsfile. Saving thechart.tsfile in your IDE will automatically re-render the chart in the builder environment, allowing you to easily make tweaks to your chart. - When finished, run the
npm run buildcommand to build and bundle your chart. This will create a ZIP file ready for upload to Luzmo in the next step.
3. Upload your custom chart to Luzmo
After developing your chart and building it to a ZIP:
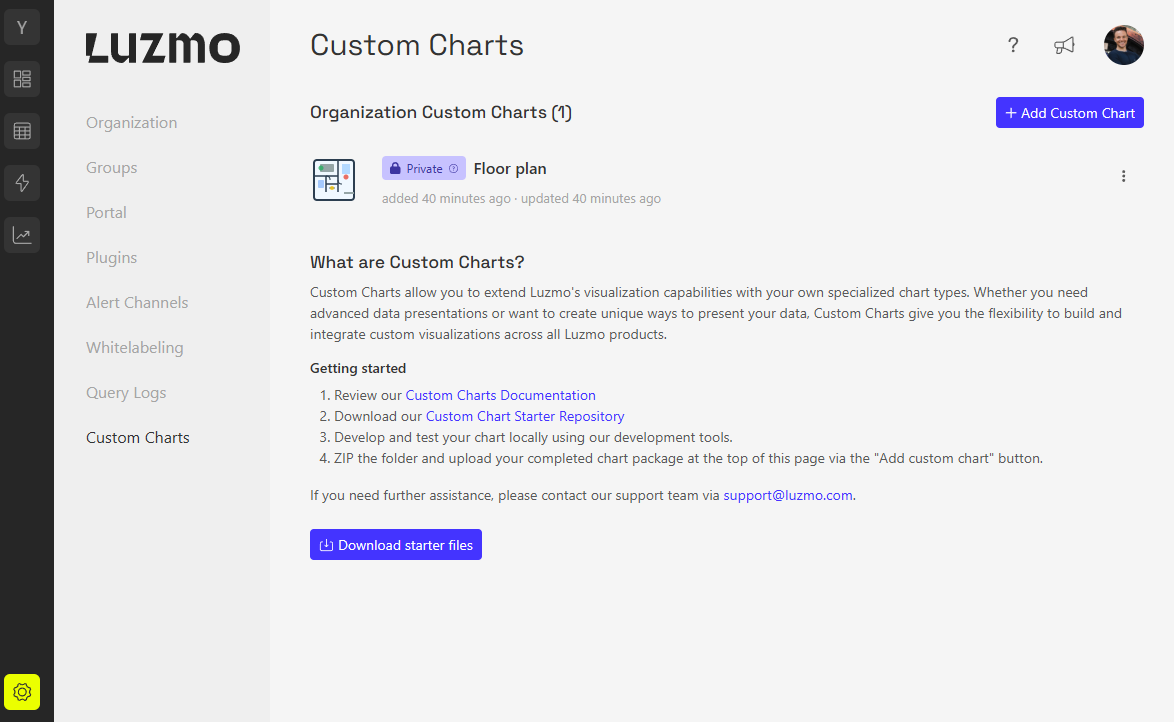
- Navigate to the Custom Charts settings page in Luzmo.
- Click the Add Custom Chart button. A modal will open where you need to define the chart type (a unique key) and the user-facing chart name. Below, you can upload your chart ZIP file that you built as the end result of step 2. This ZIP file should contain:
manifest.json: chart slot configurationindex.js: built bundle of your visualization codeicon.svg: chart icon which will be used in the dashboard editor
- Once all fields are filled and the ZIP file is attached, click the Upload button to start the process.
- Once uploaded and validated successfully, your new Custom Chart will appear in the Custom Chart list below!
Updating the code of an existing custom chart
At some point you might want to upload a new version of your custom chart (e.g. to do some bug fixes or improve a visualization). You can do so via the Re-upload chart code option in the action menu. Simply upload a new ZIP file and confirm via the button.
Once confirmed, the status will change to Update in preview. This means only you can see and test this new version in dashboards, while other users still see the old, published version. Once tested, you can publish this new version again to update the chart for everyone. More information on chart states in the next section.
Chart states: "Private", "Published", and "Update in preview"
Custom charts move through three distinct states that control their visibility and availability:
Private
- Initial status after first upload
- Only visible to you in the "Add items" dropdown: only you can add it to dashboards
- Allows you to test your chart before sharing with others
Published
- Available to all users in your organization
- Anyone in your organization can add it to their dashboards
- Cannot be reverted to Private once published
Update in preview
- Activated when you use "Re-upload chart code" to update an existing chart
- You can see and test the new version in dashboards
- Other users continue to see the previously published version
- Publish the update when verified and ready to make it available to everyone
You can manage these states for each custom chart through the Custom Charts settings page, allowing you to control exactly when your charts become available to the wider organization.
4. Using custom charts in dashboards
Custom Charts seamlessly integrate into your Luzmo dashboards:
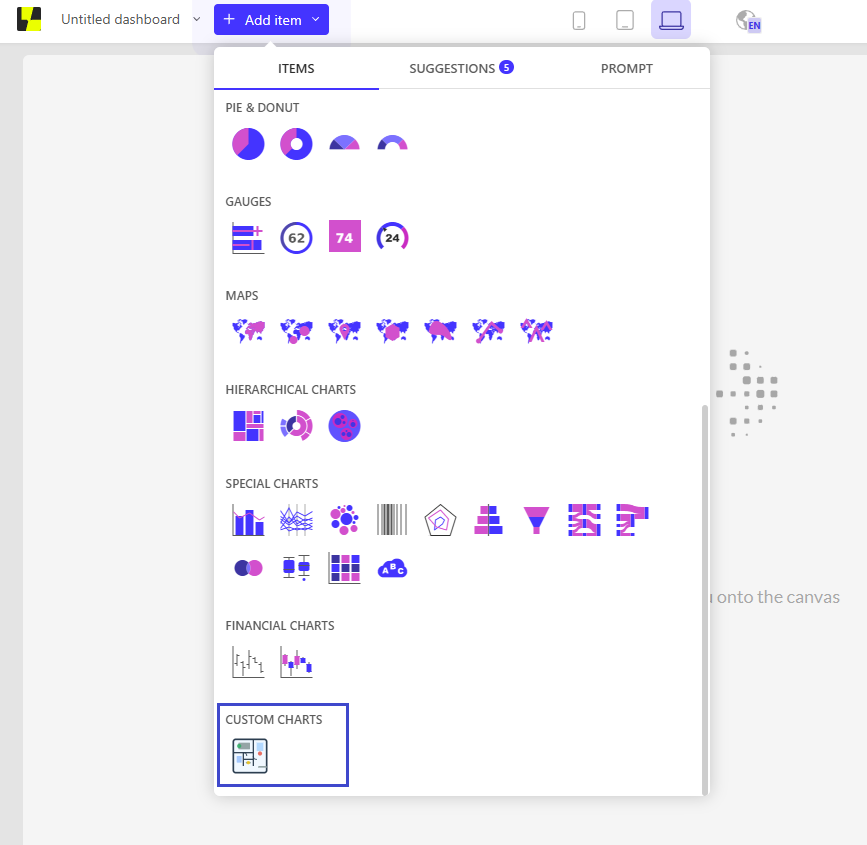
- Add them from the dashboard editor via the Add Items dropdown. Your Custom Charts will be available in a separate section at the bottom of the panel.
- You can drag and drop them to the dashboard editor and resize them just like any built-in Luzmo chart.
- Dataset columns can be dragged to your self-defined chart slots, according to the specifications in your
manifest.json(e.g. you could limit the data types for some slots). - If your chart defines options, you can adjust them from the Edit item panel, just like the built-in options on Luzmo's own charts. Changing an option re-renders the chart with the existing data, without firing a new query.
- When a filter becomes active on your custom chart, the query will automatically re-fire and your chart will be updated.
Start leveraging Custom Charts today to unlock new visualization possibilities and enhance your Luzmo experience!